New developers find it very easy to get started with Android App Development. All the tools and documents are easily available on the internet for free. This is a simple guide which will help just get started and ignite that spark which will full fill your desire to become a professional android app developer.
What Will You Learn?
- What tools to use to develop apps for Android.
- Create, Build and Deploy a simple Android app.
- Learn how to test an app on an Emulator on your computer.
- Learn how to test an app on an Android mobile.
Why Android?
Android is one of the most popular os for smart phones. The major reason is the company behind it, Google. From the day one, the OS was open for any one to use and develop apps. The ease of app submission process is the major reason it has been adopted by almost all the app developers across the world. It doesn't involves app review process making the life of app developer's easier.
Machine Requirements
Although you can get started with Android development on a 4 GB RAM laptop, it is highly recommended that you use a minimum of 8GB RAM machine. And if you are about to buy a new machine then go for minimum 16 GB RAM machine. If you are planning to use Emulators then 16GB is a minimum which I can suggest.
I would highly recommend to use Mac for your app development if possible. The reason is very simple. iOS and Android are the top 2 mobile os in the market. On a Mac you can develop for both iOS and Android. If you are planning only android and your budget doesnt permits Mac then you can go for Windows machine. Still I will recommend not to compromise on the RAM.
Environment Setup
Now that you have the infrastructure in place, time to setup your environment for app development.
Android Studio
The official tool for developing app for Android is Android Studio. It is Integerated Development Environment build upon Intellij Idea. Earlier Google was using Eclipse with an External Plugin which was available for download from Android website. But then Google made Android Studio as it official tool for Android App Development.
You can download Android Studio from the below link.
Once you are done with downloading the installer for Android Studio, you can run it to start the installation process. Make sure that you have active internet connection through out the environment setup process.
The whole install process is wizard based. Make sure you take your time while choosing the options and going through the wizard. As the wizard keeps on changing no use explaining much here as it will get outdated in no time.
Android SDK Manager
There is a separate sdk for each and every version of android released. If you have installed the app just now then you might be having the latest sdk by default. If not you better install the sdk for atleast 2 versions.
- The Latest Android Version.
- The Android Version on your Test Mobile.
To install the sdk you can open the SDK manager by going to the menu Tools>SDK Manager.
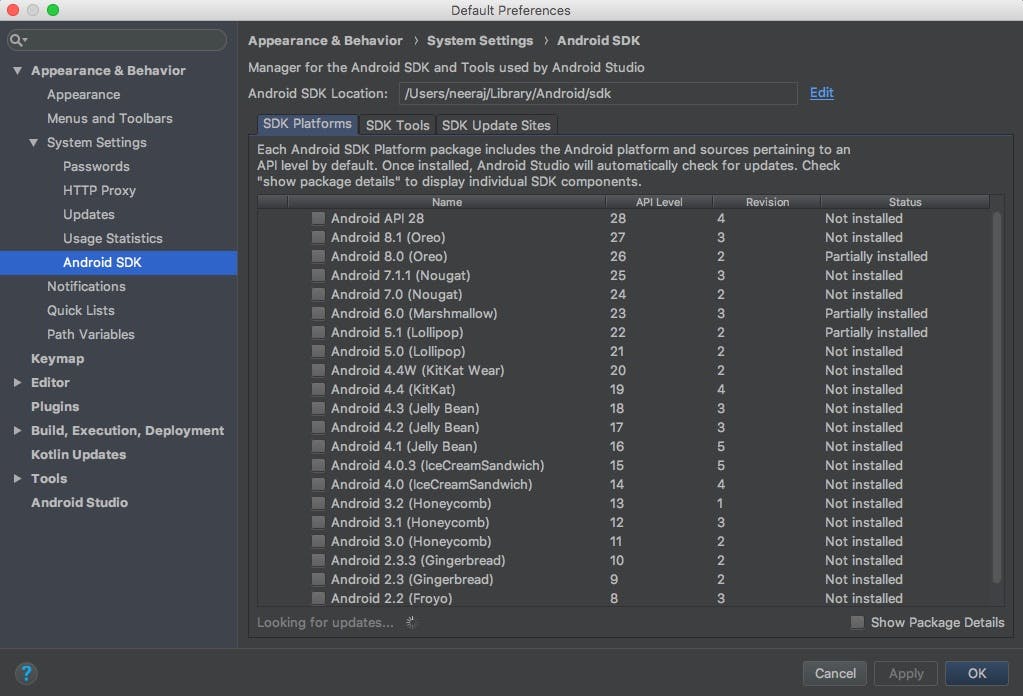
AVD Manager
Once you are done with the above process, you can go ahead and create AVDs (Android Virtual Device). These are the Emulators on which you can test your app on your computer itself.
To open the AVD lists, goto menu Tools>AVD Manager:
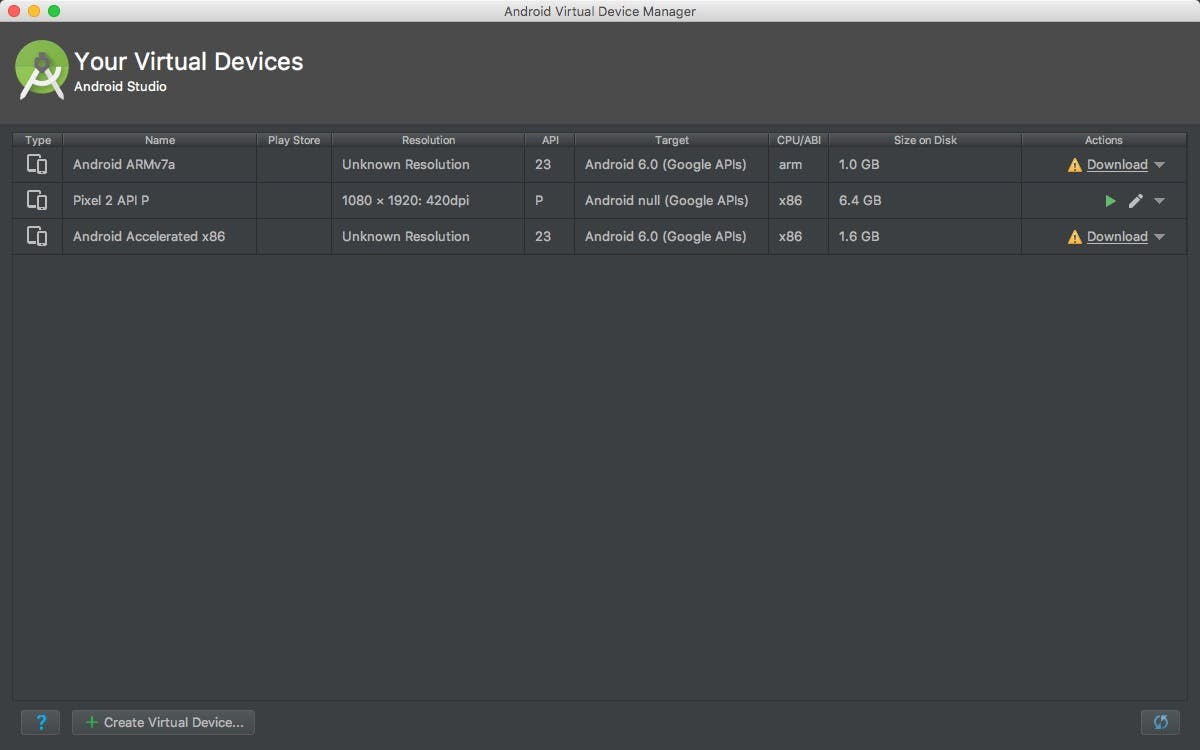
Now click on the Create Virtual Device button.
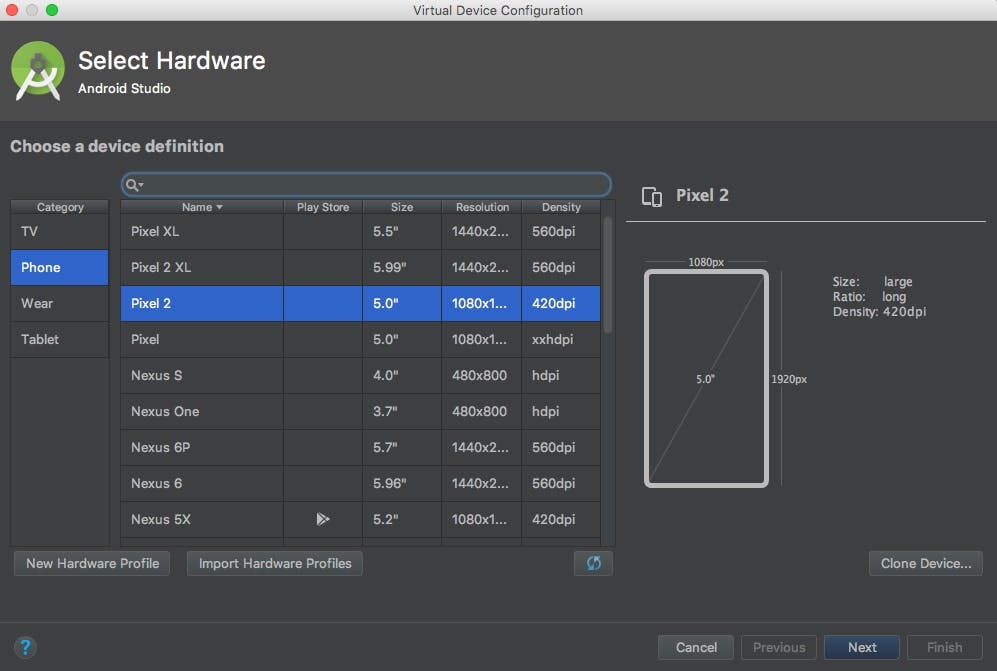
Choose Phone as the category and select the Phone Pofile which you want to set. Once it is done click on next.
Now you will need to select the system profile.
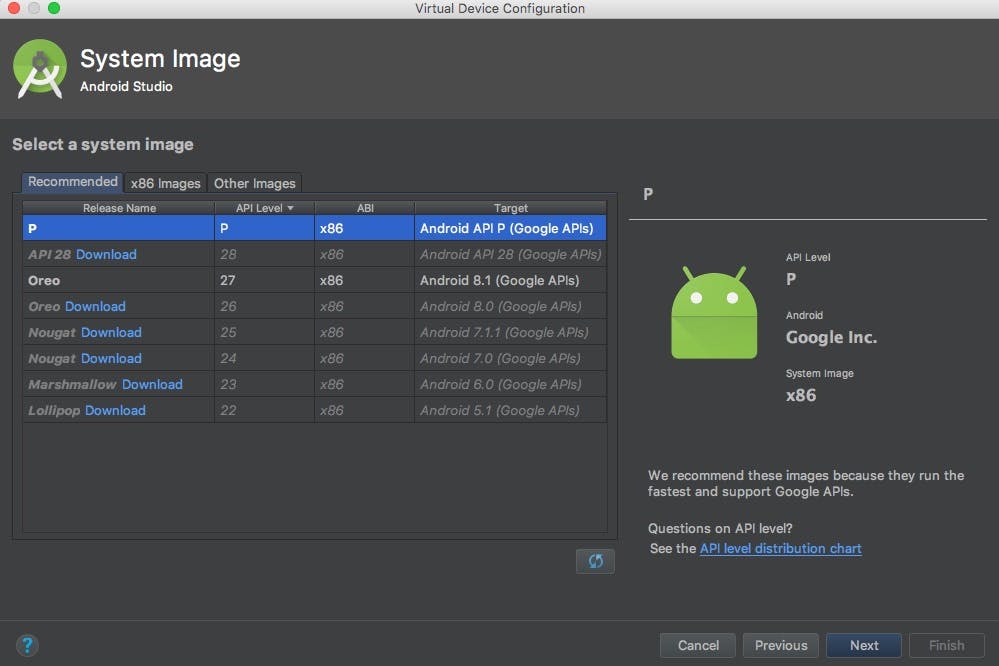
Just select the release version which you want to set for the emulator. I would recommend choosing the latest stable version available. Normally it will be on top. Once done click on next.
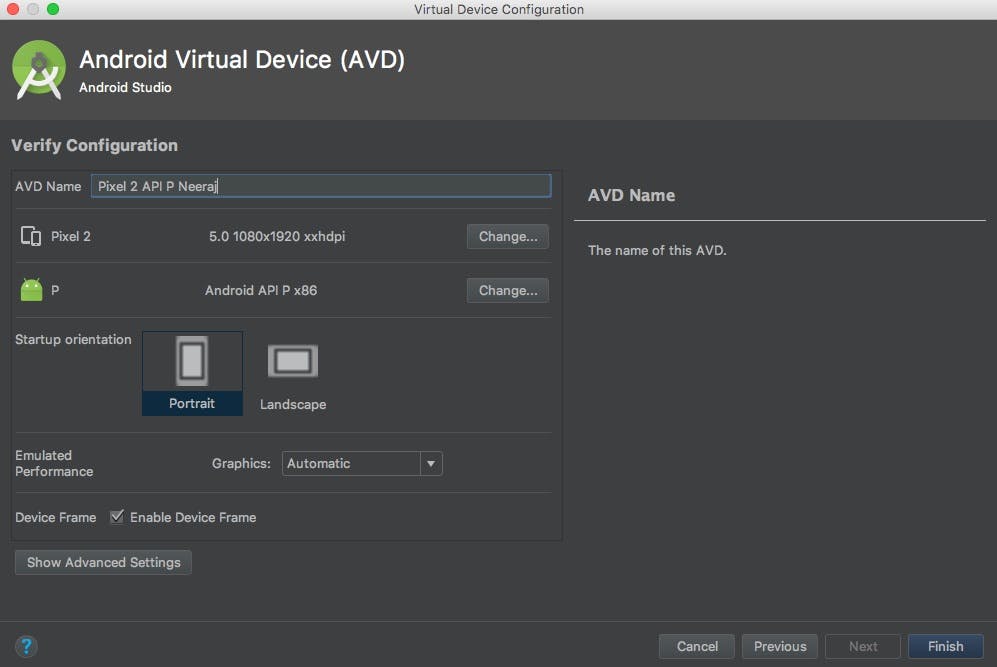
Set the Name. You can leave everything else as default. Click on Finish. You are done.
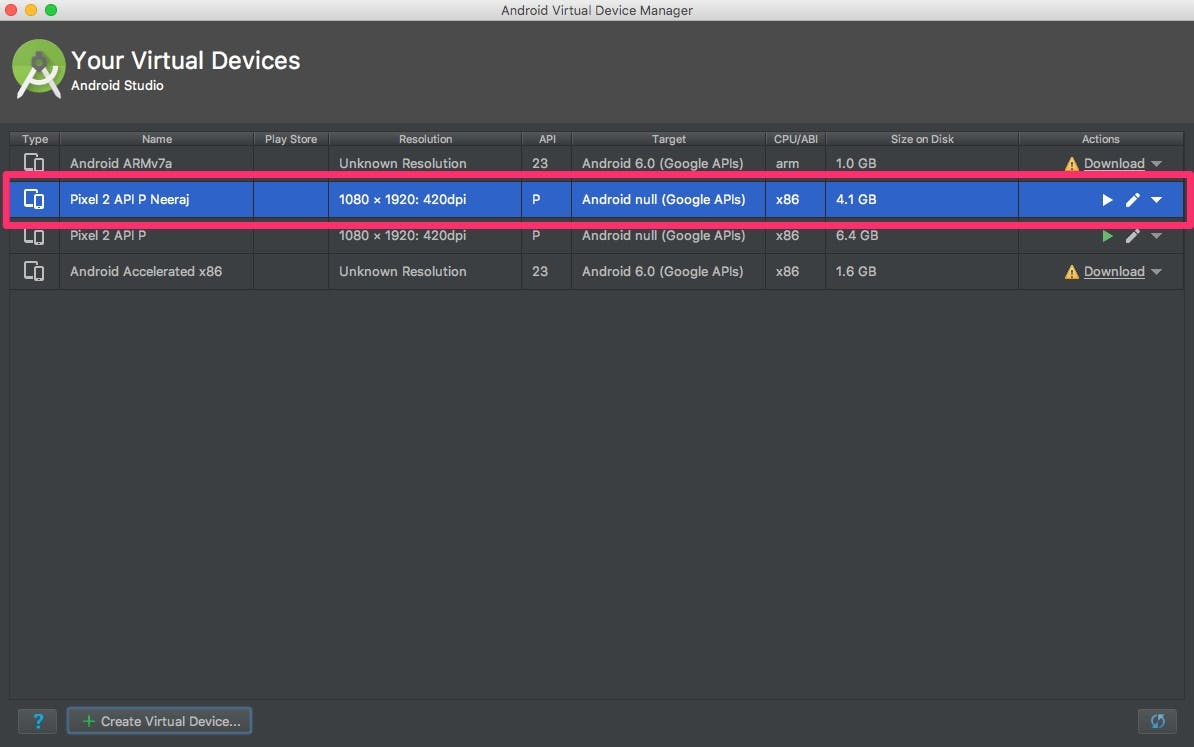
Now you are ready to get started with Anroid App Development.
What Language to use to Get Started with Android App Development, Java or Kotlin?
This is a very important question which will confuse any new android app developer. First let me tell you a brief history about Android.
Android was started as a company which made OS for Smart Cameras. It had used Java for its development. At that time Sun Micro Systems were the owners of Java. Google has used Java for most of its development after it took over Android.
Sun Microsystem was aquired by Oracle. It meant that all the rights for Java with Sun Microsystem was also transferred to Oracle. Google became skeptical of using Java for its development as Oracle was having full control on Java.
Thus in recent years Google started its search for languages that can replace Java both on Client and Server side. Now Google is promoting Kotlin as official language for Android App Development.
Kotlin being a newer language is certainly better than Java. Although Java is evolving but many apects of Kotlin makes it a better choice. But Java cannot be ignored completely as of now considering that many apps and library are already developed on Java.
Keeping this in view Android Studio is developed in such a way that you can have both Java and Kotlin in your app. It is highly recommended if you are developing a new app then develop it in Kotlin, as it is here to stay.
If you want to learn Kotlin as a language then you can checkout its official website.
Android Project
Lets get started with Android app development in Android Studio by creating a project.
Welcome Dialog
When you open the Android Studio you get a welcome dialog which shows you the recent projects which you have worked on. It also shows you several links on the right side.
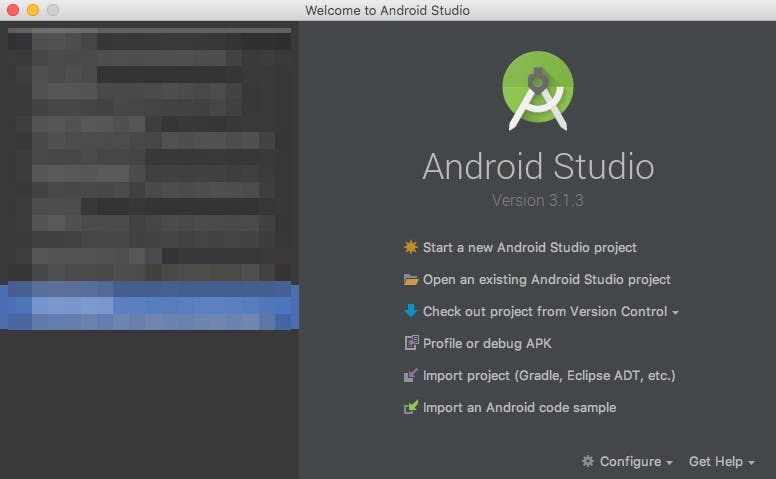
If you have installed Android Studio for the first time then the left section will be blank.
Create Android Project Dialog
To create a new project click on "Start a new Android Studio Project" link. You will get the Create New Project dialog as below.
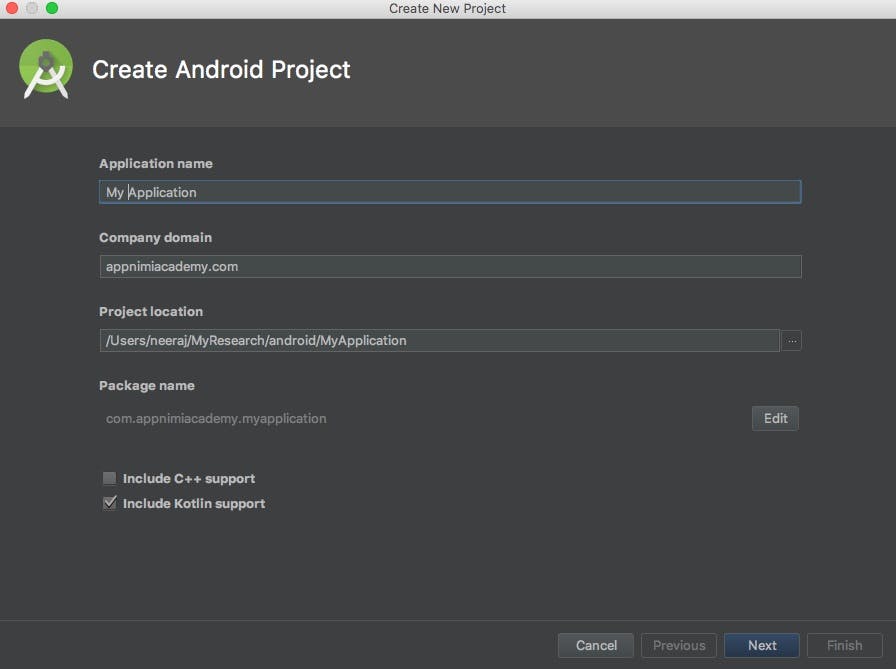
You will need to set the following parameters. Once done click on next.
- Application Name.
- Company Domain : This will be used in setting the package name.
- Project Location.
- Include C++ Support : This is used to develop usin android native libraries.
- Include Kotlin Support : Ensure that you select this checkbox if you want to develop usng Kotlin.
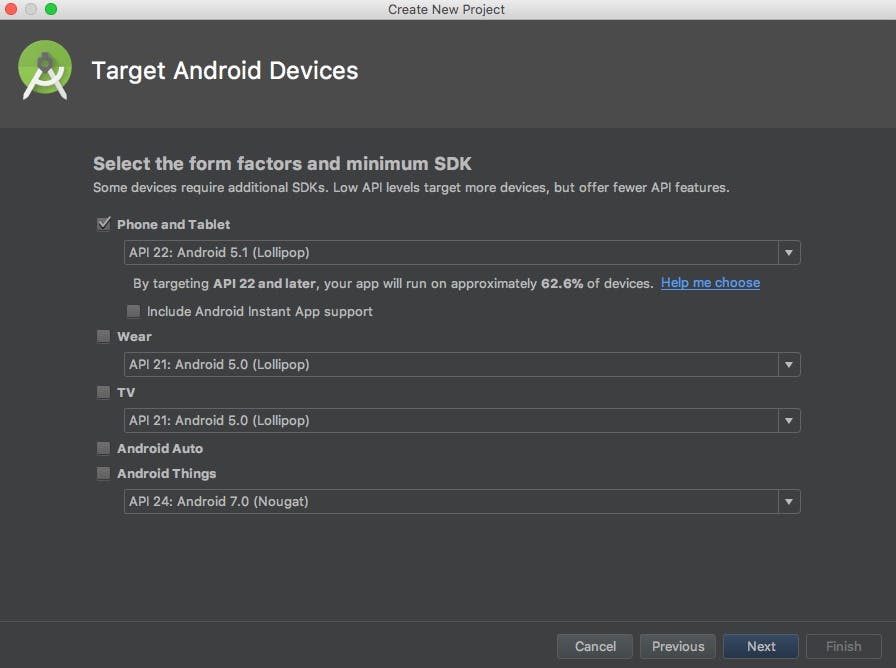
Target Android Devices
Once you click on next in the prvious dialog you are shwn the Target Android Devices dialog. Here you choose the form factors and minimum sdk.
Activity Templates
The next dialog in the project creation wizard asks you to choose an activity template so that android studio can generate some codes and layout for the project.
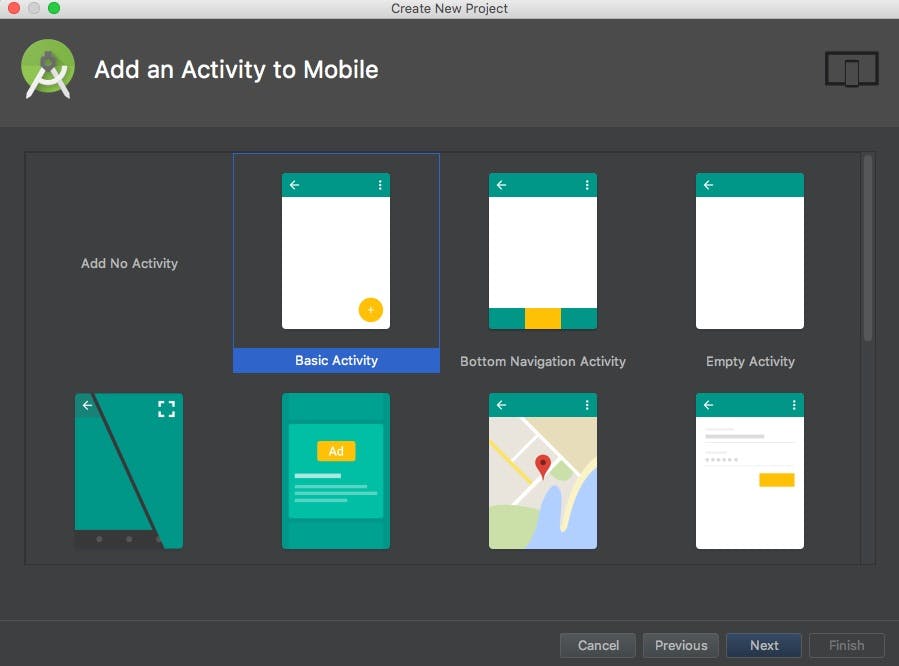
You can choose Basic Activity. It has most of the basic stuff you need for now.
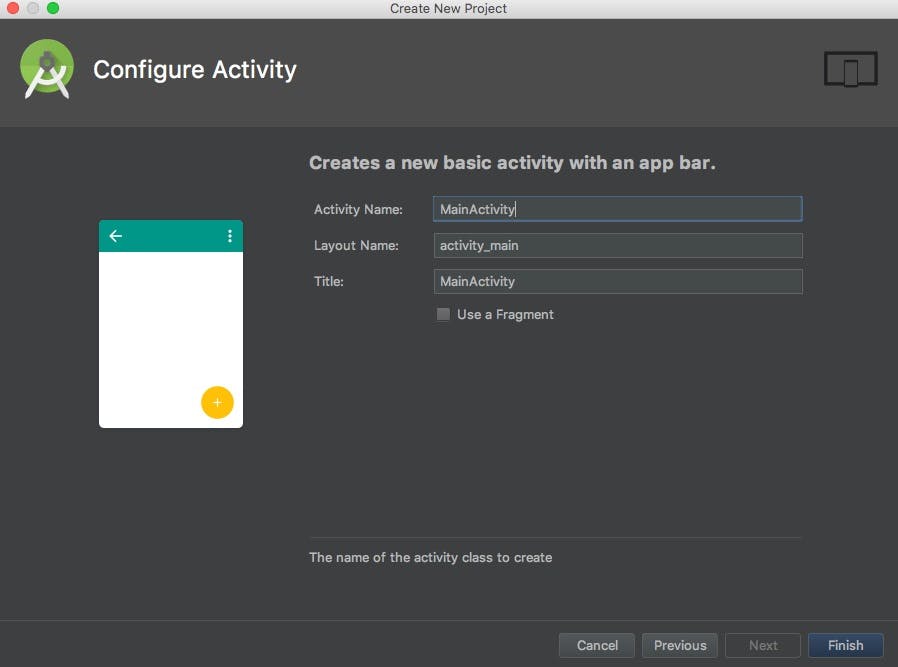
Activity Configuration
Next you will need to set the Name, the layout File name and Title.
Workspace
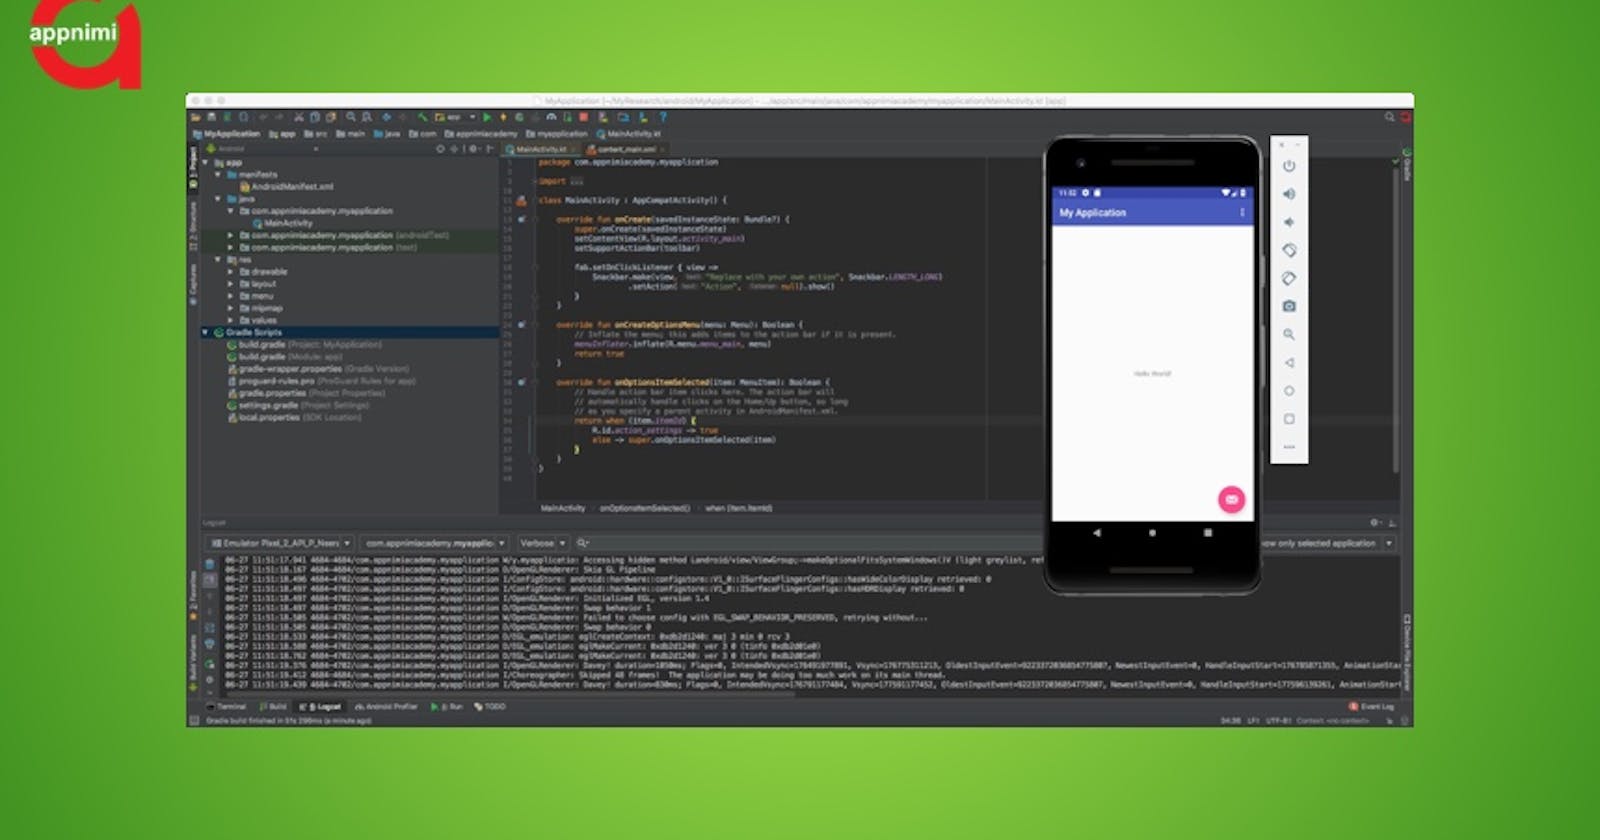
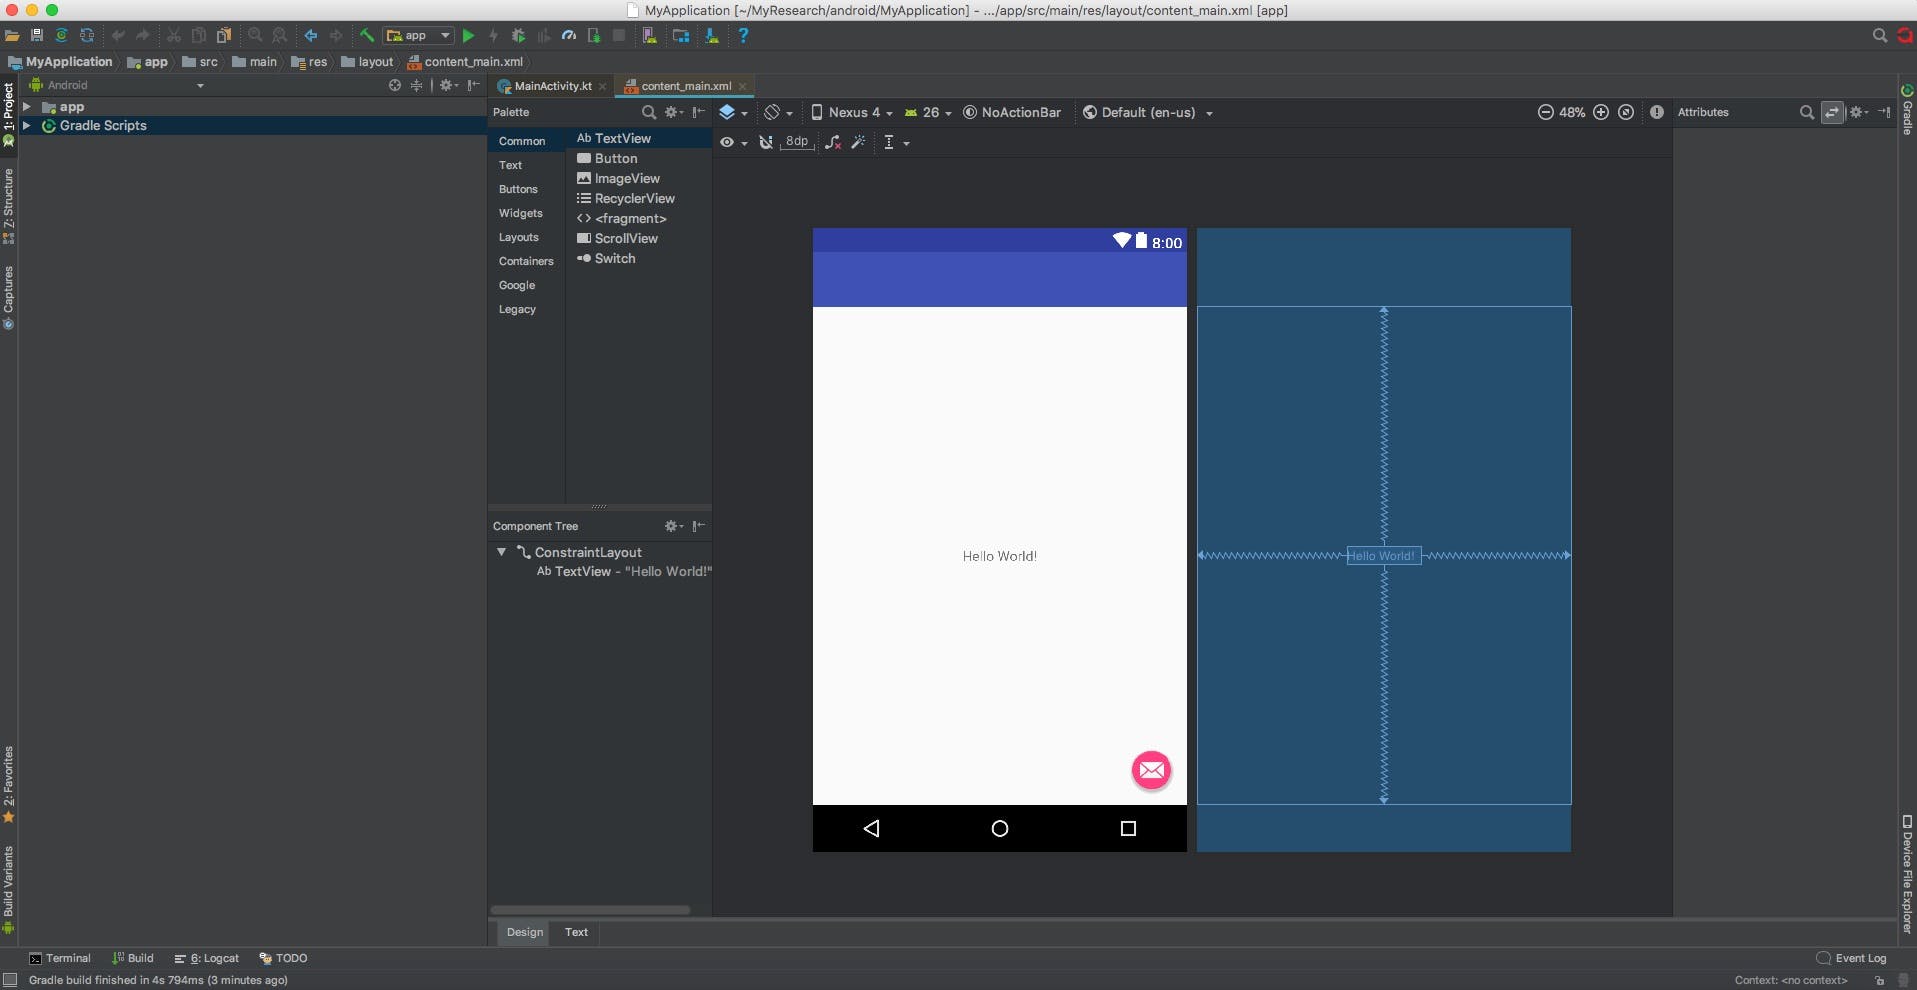
After the project is created the Android Studio first look will be something similar to the following.
Android Studio Basics
Now that you have the project created, let me walk you through the minimal features of Android Studio which you will need to get started.
Project Tab
This is the tab on the left side of inside Android Studio. It will show you all the files and resources for the project.
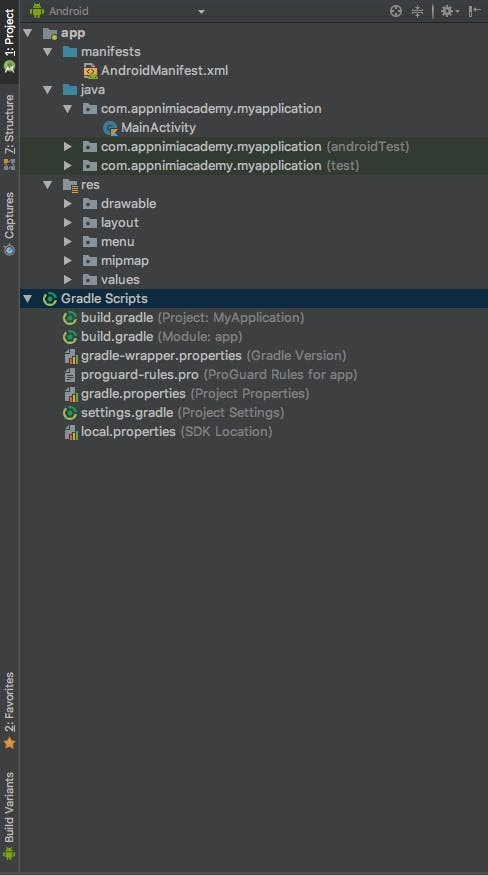
As you can see it is divided into 2 sections:
- app
- manifests: It has the configurations for activities and the application.
- Java : The source files for the app. Mostly ".java" files or ".kt"
- res : It will contain all resource files to support the app such as images, design xml for the activities. There are other type of assets file which I will take up when explaining some advance topics other articles.
- Gradle Scripts : These are the build scripts for the the app and the libraries to be imported.
Activity Design Tab
When you select an xml file for an activity then you will get the following tab.
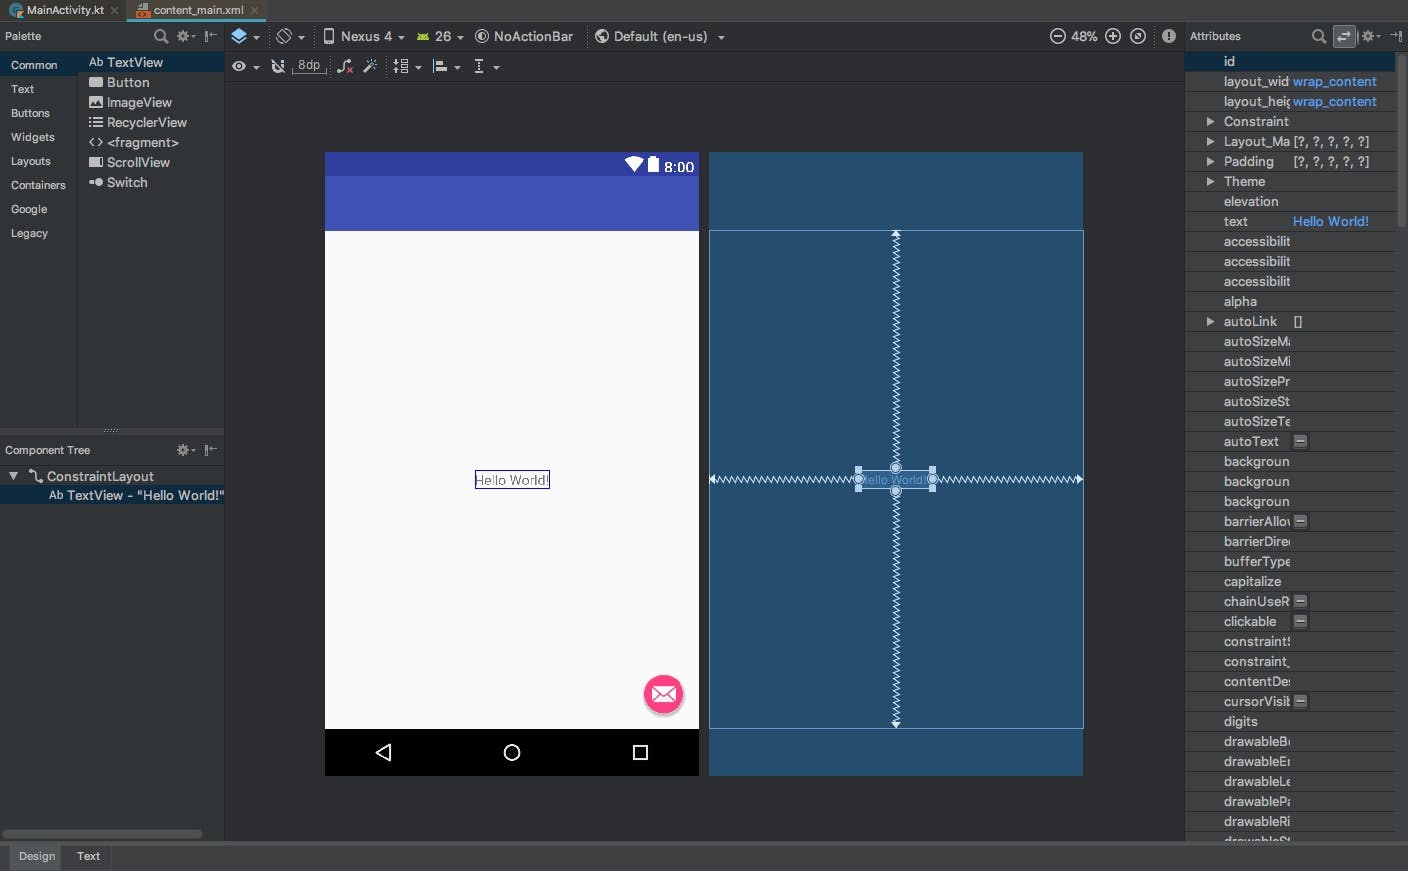
You can design most of the activity layout in the design tab. It comprises of the following sub tabs:
- Pallette: It contains the different components which can be dragged on to the activity layout file.
- Attributes: Here you can customise the parameters as per your need. In your learning period you will not be doing much stuff out here.
- Text Tab: This will contain the raw xml corresponding to the design of the activity. It is for advance android developers. Infact many professional developers prefer to use this tab instead of the main design tab. It gives them more control.
Source Code Tab
When you open any source file it will open up the following tab.
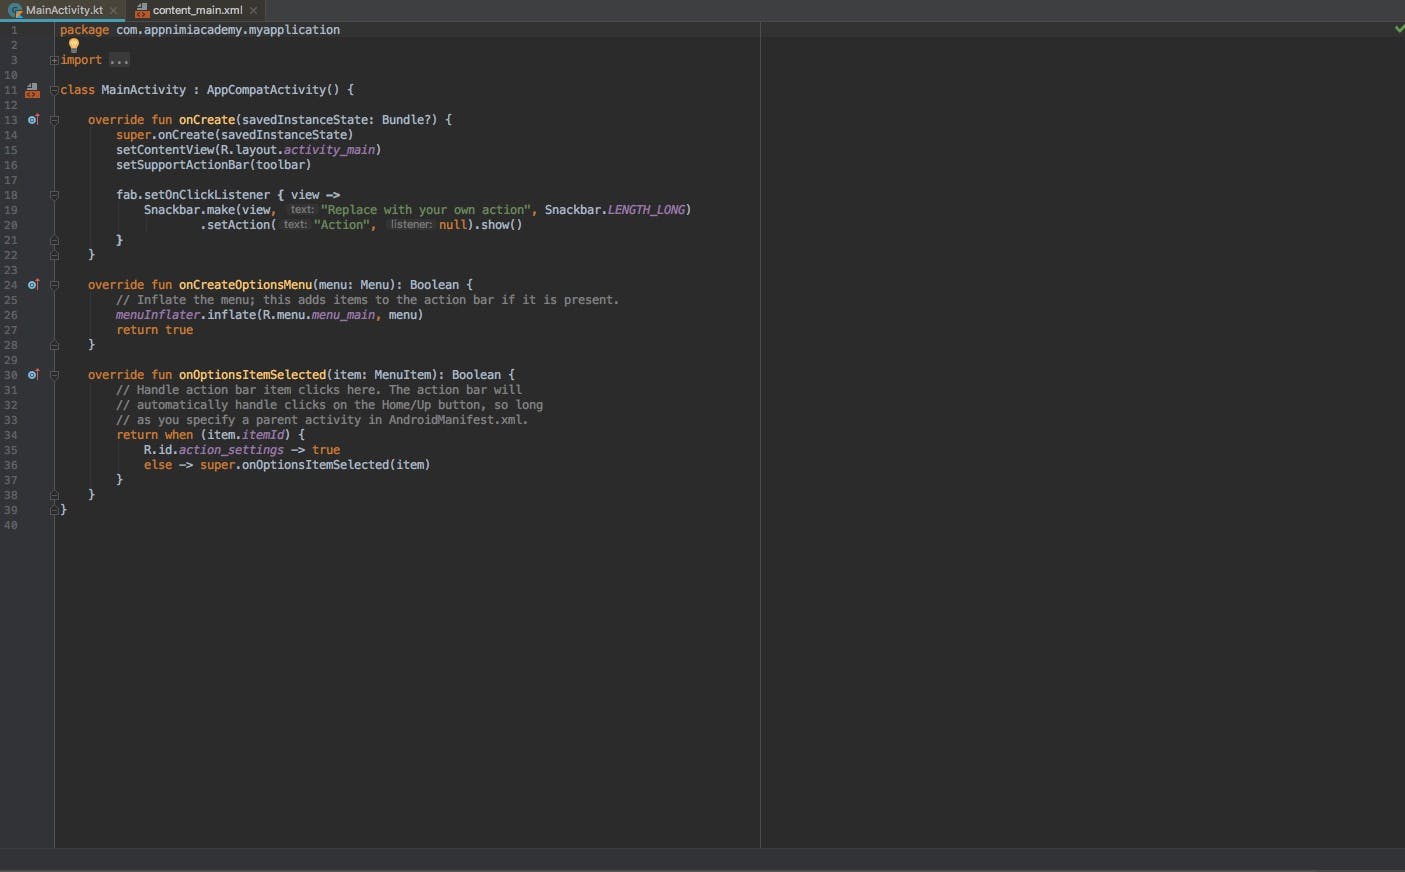
This is where you can write your Kotlin or Java codes. All the logics for your app will be added here.
There are many more tabs and features in Android Studio which are very useful. We will not discuss that here as it will be overwhelming for now.
Running the Project
Now that you know the basic usage of Android Studio, you can try to run the simple application which you have added.
To do that you just need to click on the Run button in the top tool bar. There are other ways of doing it, but for now you can use this button.

Running your App on AVD
Once you click on the button you will be shown a dialog where you can select your emulator or the AVD.
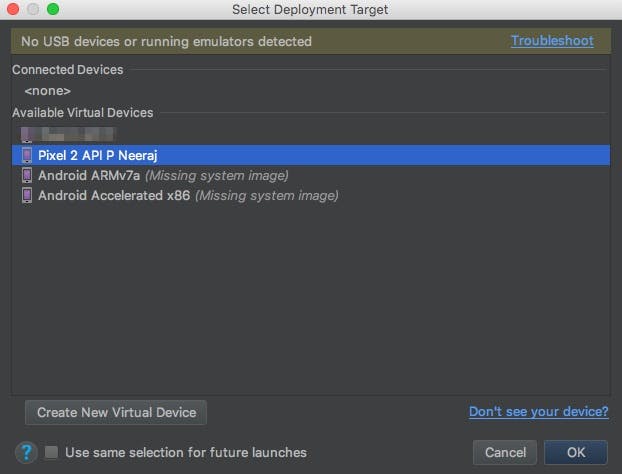
You can see the AVD which you created earlier. Select your AVD and click on OK.
You might be shown the following popup. Just select Proceed without Instant Run.

You will see lot of logging activities in the logcat tab. There will also be a message saying Gradle Build. Once the build is over the AVD will be starting and running your app.
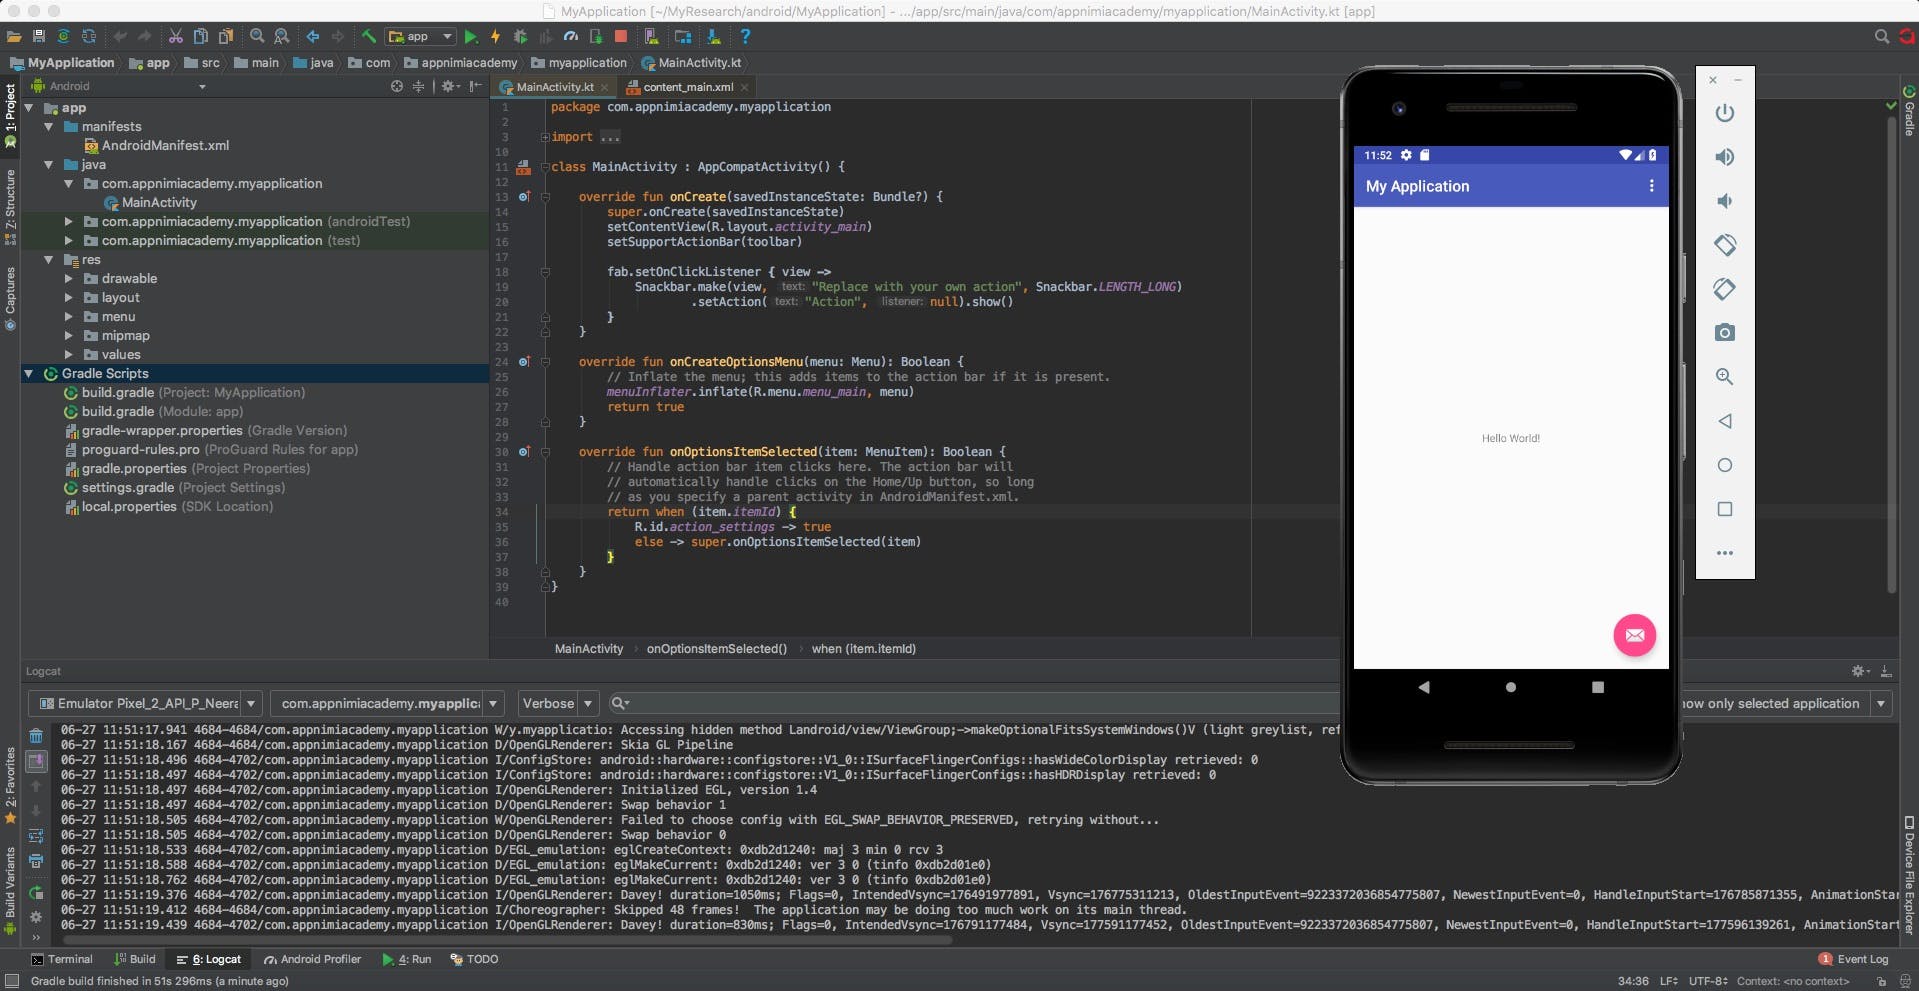
So you have now run your first android app.
Running your App on an Android Device
Now it is time to run your app on an actual Android device. Setup your device as follows:
- Connect you mobile to your machine using a USB cable.
- If you are running on Windows you might have to install drivers for your mobiles if it doesnt detects you phone.
- Enable USB Debugging in the Developer Options in your Mobile. Here are the steps to enable USB debugging:
- Goto the Settings menu.
- For Android 8 and higher Goto System menu.
- Goto About Phone menu.
- Tap on Build Number 7 times. It will show a toast message that Developer Options is enabled.
- Return to previous menu.
- Goto Developer Options menu near the bottom.
- Enable USB Debugging.
- Now click on the Run button on the tool bar in the Android Studio.
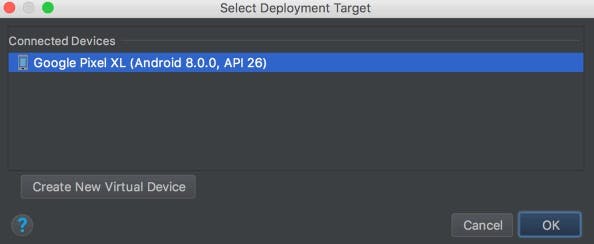
- In the Select Deployment Target dialog, select your device and click on ok.
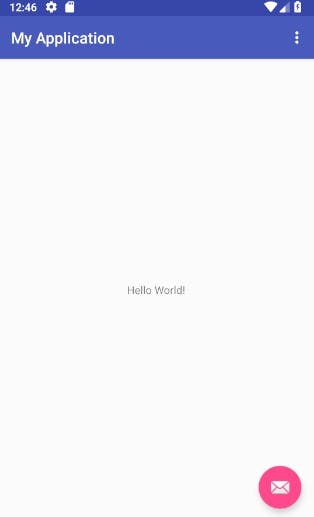
- Android Studio will build and install your app on the mobile. You will see the Hello World message on your screen.
Sample Projects
Android Studio has lot of sample projects which will help you get started with Android App Development.
Here are the steps to follow to import the Andoid Code Samples.
- Close all the projects.
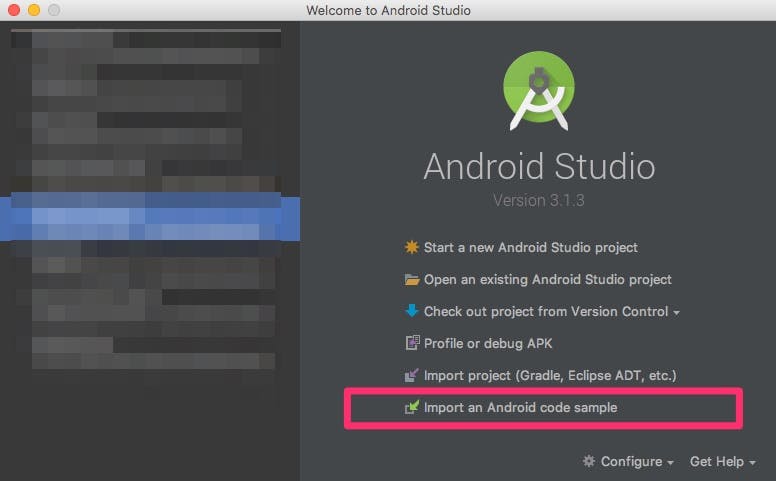
- Open the Welcome Dialog of Android Studio.
- Click on Import an Android code sample link.
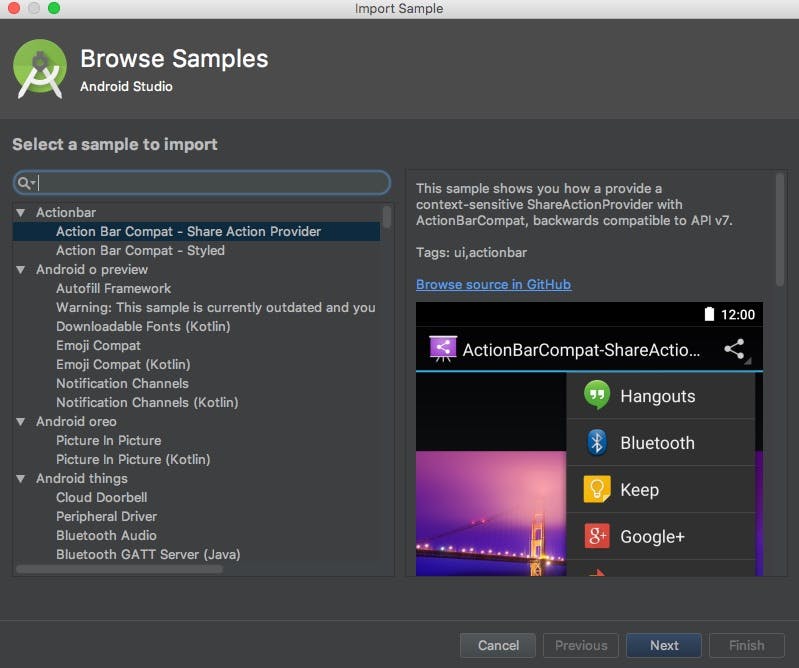
- It will show you Browse Sample dialog.
- Selec the Sample which you want to play with and click on Next button.
- It will bring up a Project Configuration dialog.
- Just select the default values and click on next.
- It will start downloading and building the sample app.
- It might take some time depending on your internet speed.
- Once done the projec will open in your workspace.
Conclusion
So now you have started your journey to become an Android App Developer. In this article you learned about Android Studio. You also learnt how to create, build and deploy android apps to an emulator. You also learnt how to deploy to a real android mobile. And now you can also play around with the sample code projects.
It is time for you to get your hands dirty and learn more and more about android.
Checkout other articles on Android App Development. If you are stuck up somewhere just comment below and I will try to help you out. Also do share this article with your friends. It will motivate me to write more articles for you.
